Gmail is amazing. But, it looks a lot more professional to send emails from @yourdomain.com instead of from @gmail.com. If only there was a way to continue to use Gmail while sending emails from your custom domain name.
It turns out there are two ways to easily accomplish this. One option is to pay Google $6 per month for GSuite.
But who needs another monthly payment? It would be a lot better if you could just use Gmail with your custom domain for FREE. In this post, I’m going to show you exactly how to set it up.
1) Create a Free Gmail Account
Create a new free Gmail account using Google’s instructions. Name this account whatever you feel like as the name will never show up anywhere. Just make sure you can remember the credentials.
2) Purchase a Custom Domain Name
I know I said this was free, but I assumed you already owned a domain name that you wanted to use for this. If you do not, I usually buy domain names from NameCheap.com, but anywhere you want to buy your domain will work for this.
3) Setup Your Domain Name with Your Hosting Provider
I also assumed you already have a hosting provider. My website is currently set up with Bluehost. So I’ll be using Bluehost to illustrate how to set this up.
However, the general steps should be the same even if you’re not using Bluehost. Most hosts provide email capabilities and that’s what we’ll be using Bluehost for. If you don’t have a hosting provider, you can set this up for free with Zoho Mail.
4) Create Your Custom Email Address
This is where you create the email address you’d like to ultimately use. So YourEmail@YourDomain.com 🙂
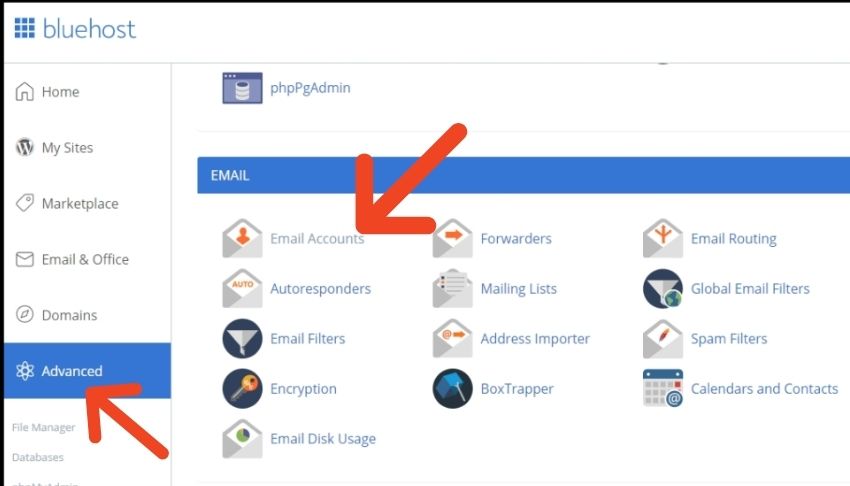
With Bluehost, it’s effortless to do that. Just click the “Advanced” tab and scroll down until you see “Email,” then click “Email Accounts.”
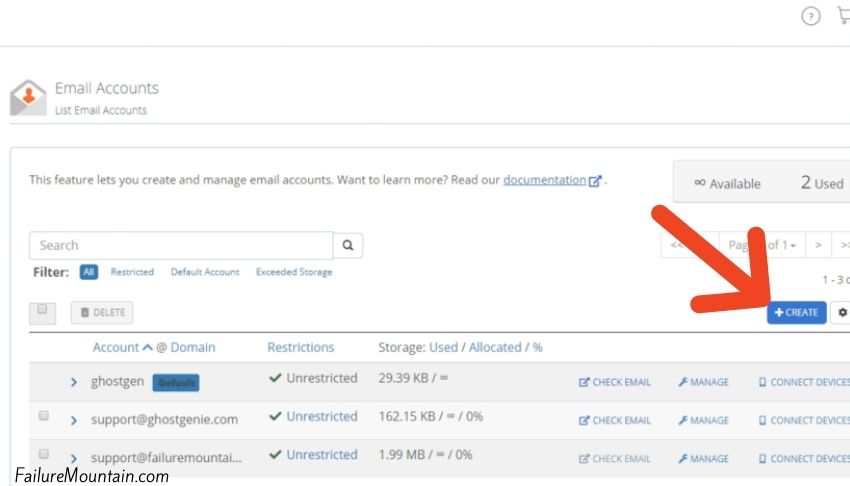
On the next page, click the “Create” button.
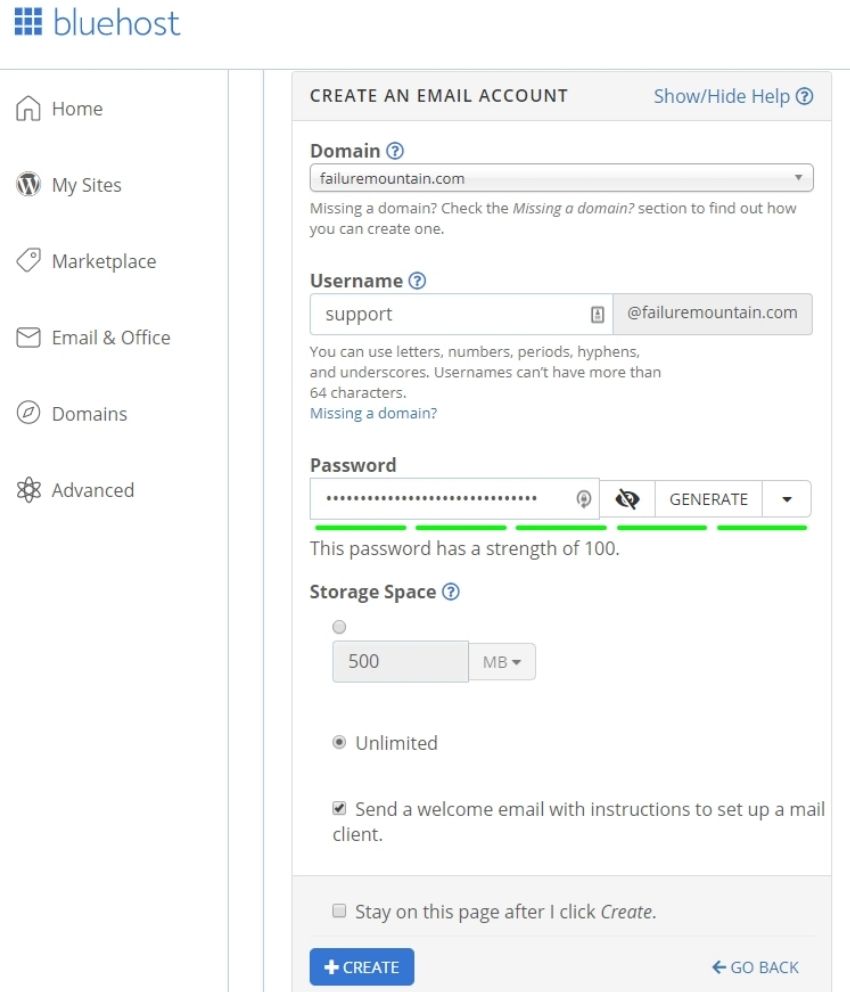
On the next page, specify the domain you want to use (if you have more than one). Then choose the username you’d like to send emails as. Also, be sure to remember your password as you’ll need it later.
5) Forward Your Custom Email Address to Your Gmail Account
Forwarding emails from your new custom email address to the free Gmail account you created earlier allows you to read all your emails using Gmail.
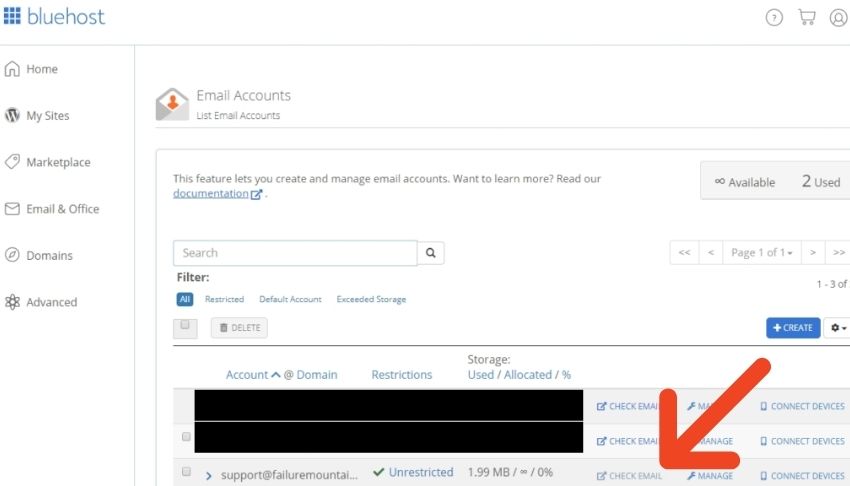
To forward emails in Bluehost. Click the “Check Email” button next to the account name you created in the previous step.
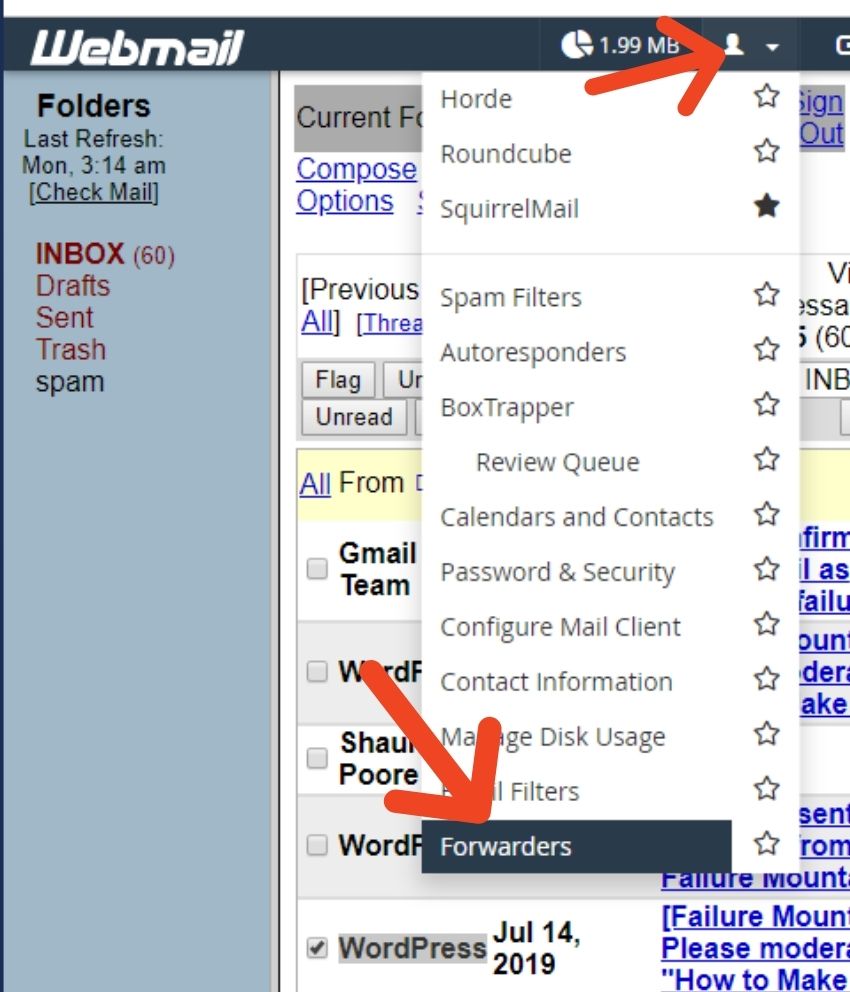
From the webmail interface hover over the user icon and click “Forwarders.”
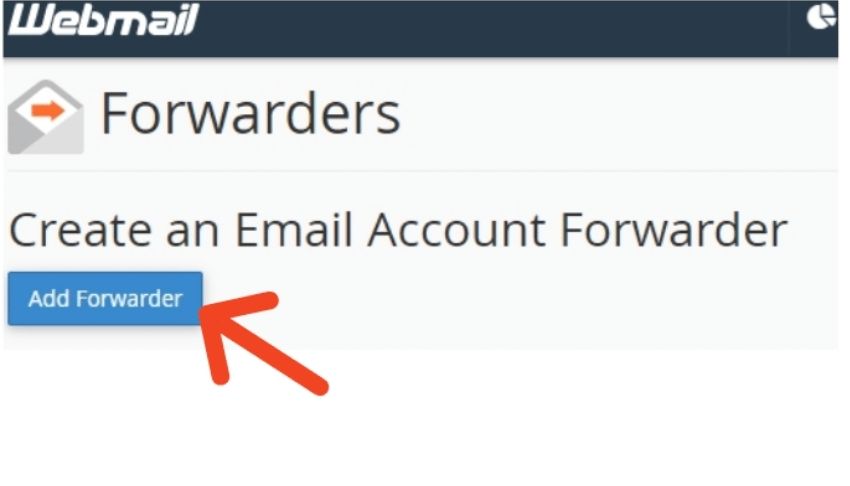
On the next page, click the “Add Forwarder” button.
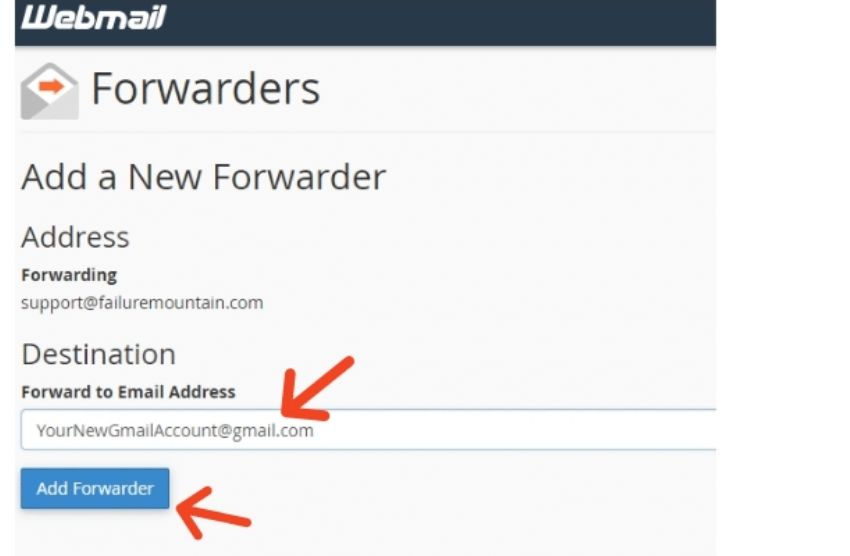
On the page after that, enter the address of the free Gmail account that you created in step 1.
6) Setup Your New Email As an Alias in Gmail
Congratulations, you’re now receiving all of your emails in Gmail for free. The final step is to create an alias so that you can also SEND all of your emails using Gmail for free.
To set up an alias in Gmail, log in to your free Gmail account created in step 1 and click the settings icon. Then click “Settings.”

Then click the “Accounts and Import” tab and scroll down until you see “Send mail as:”. Click the “Add another email address” link.

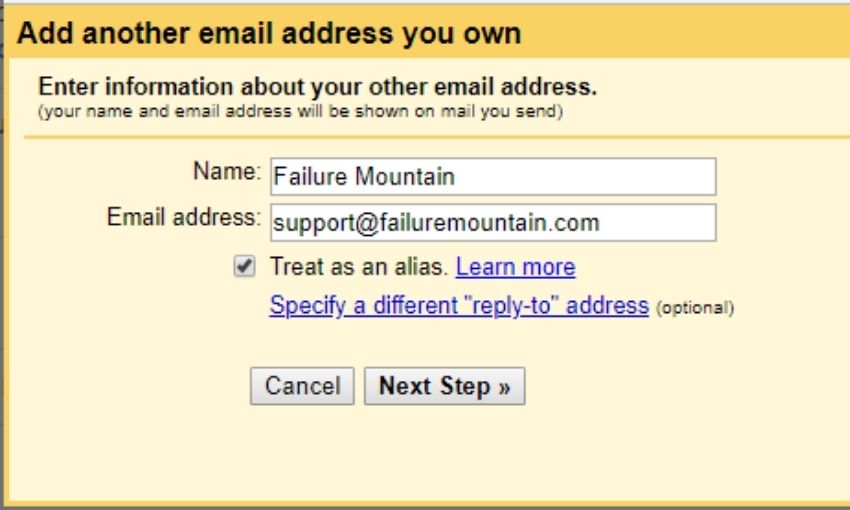
Enter the name you’d like to use for the email address. Then enter the custom email address you created in Bluehost as the email address. Make sure the “Treat as an alias” checkbox is checked.
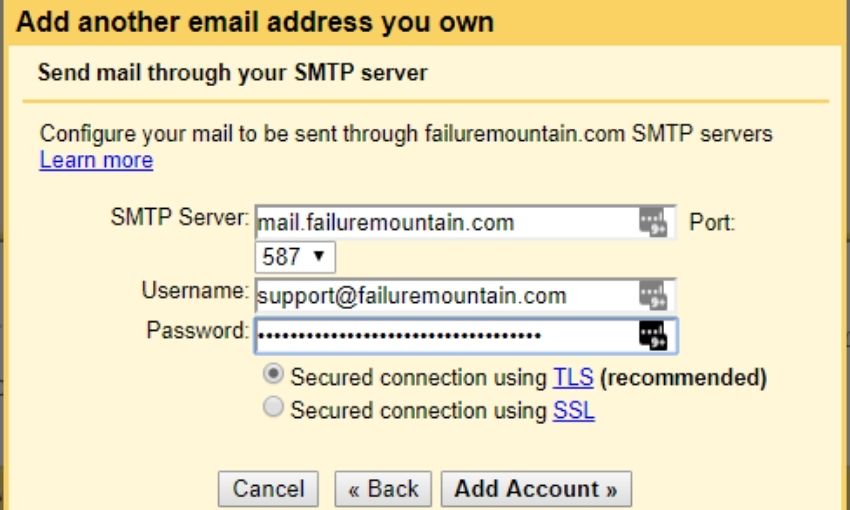
- On the next page, use “mail.yourdomain.com” as the SMTP Server. (Don’t literally do that, swap out yourdomain.com with your actual domain name.)
- Leave the Port as the default.
- Set the Username to be the same as the custom email address you created in Bluehost.
- The password will be the password you created in Bluehost for that email address.
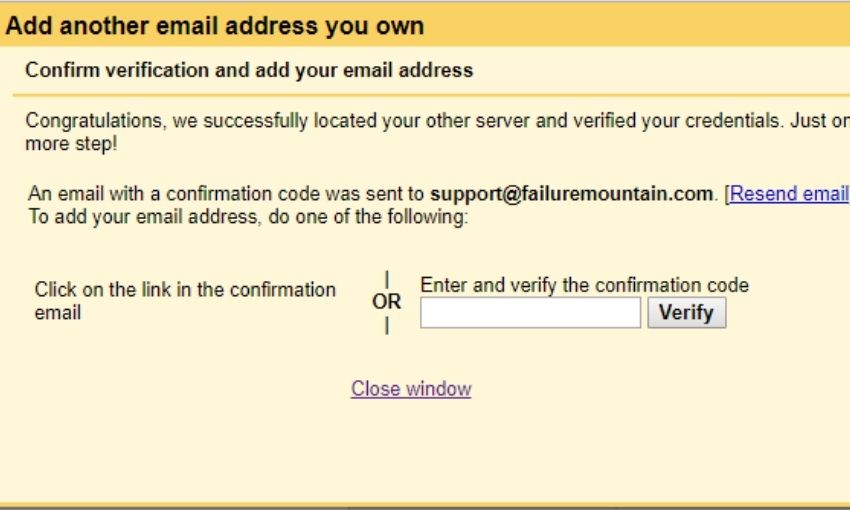
If all went well, Gmail should send a confirmation email with your confirmation code. Simply enter the confirmation code and click “Verify.”
Finally, go back to the “Settings -> Accounts and Import” tab. Find the “Send mail as:” section and set your new email address as the default address to send mail as.

Once you click that button, you’re done!!! You’re now sending and receiving emails in Gmail using your custom domain for free! Amazing!
How to Create a Custom Domain Email Address with GSuite
Maybe you run a larger organization and would rather use GSuite to better manage your companies email. Or perhaps you want some of Google’s excellent collaboration features to use within your team. If that’s you, here’s how to set that up.
- Visit the GSuite site here and choose a free trial plan that fits you.
- Click “Get Started”, fill out your information, then enter your domain name if you’ve already purchased one. (If not I usually buy them from NameCheap.com or you can buy from Google directly)
- Enter the email credentials that you’ll use to log in to your account.
- Enter your payment info.
- Now you just need to verify you’re the owner of your domain name. Google should provide plenty of options. The easiest way is probably either to edit the header of your website to put the code in or to add a text record using Bluehost.
- You’re done! Just log into your GSuite account and manage as many email addresses with your custom domain that you need.


