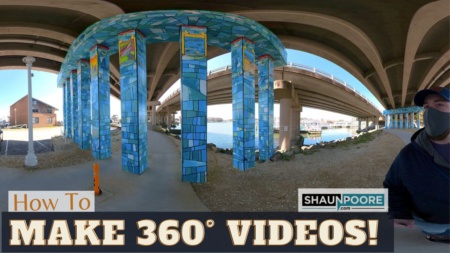

When I saw my first 360° YouTube video (see my 12 favorite VR videos here), my mind was blown. I did not know you could do that! I needed to know how expensive and difficult it would be to create a video like that.
Turns out it’s not that bad. In early 2026, it’ll cost you $400-ish for a legitimate 360° camera, and editing the video is easier than I thought it was going to be!
Consider Filming in 180°
I intend to write an entire post on filming 180° video in the future.
The gist is that it’s much cheaper to get a suitable camera setup if you’re filming in 180° than it is for 360°. You can basically just buy this Canon Lens for $2,000 and get decent results with a Canon R5 or better. If you already owned a premium canon camera you can obtain the type of quality that would only be possible by spending 10’s of thousands of dollars on a premium VR camera.
Plus, it’s easier to hold your viewers attention in 180° than it is in 360°.
What Camera To Use
You’re not going to be able to use a normal camera for 360° video. 360 cameras typically have two extremely wide angle lenses on both the front and back of the camera. On an iPhone, both the front and back cameras lenses aren’t wide-angle enough to pull it off.
YouTube has a list of cameras it recommends for 360° video. And I have an entire blog post about the best 360 cameras in 2026. Long story short, an 8k+ video looks a lot better in VR, but those cameras tend to be $5,000+ right now. So I recommend going with one of the two budget options if you’re just looking to see if you like this (I bought the Insta360 One X2 and used it to create the video/images in this post, overall it did a great job for the price).
- Insta360 ONE X2 Action Camera ($400)
- GoPro Max ($450)

360° Video Editing
I don’t know if this is true of all 360° video cameras, but the Insta 360 One X2 records files in a custom file format (.insv). Meaning I had to import all of their custom .insv files into the Insta360 studio app, then export the files to .mp4’s. An annoyance for sure. But overall, not too hard to overcome.
Simply drag your .insv file into the Insta360 Studio app click file-> Export. (Note: Make sure you’re in the regular view and not “FreeCapture” mode when you do this if you want a 360° video file to output).

The good news is once you have the .mp4’s, both Premiere Pro and Final Cut Pro X can natively support 360° video editing. I found the editing process to be quite intuitive and not notably different from editing regular video files. There is one very important thing you need to do though. Make sure you create a new project with the 360° Video Format selected and a 360° Monoscopic Projection Type. Otherwise, this will fail miserably.

Most of my regular FCPX plugins didn’t work with 360 video because they’ll become badly distorted in 3d. However, FCP does have some 3d text effects that did OK and companies like motionVFX have cool looking title plugins available if you get really into this.
Exporting your 360° video is exactly the same as exporting a standard video. Just make sure you see the 360 tags are included when you export so that YouTube will know it’s a 360° video.

Uploading a 360 Video to YouTube
Uploading a 360 video to YouTube is exactly the same as uploading a regular video (Assuming you exported your video with the proper 360 tags in the previous step). Simply drag and drop.
Can I Export 360° pictures from 360° video?
I love the idea of walking around lackadaisically filming 360 videos and then being able to grab a photo of any cool moments that happened. Luckily, this is easy to do. If you downloaded the Insta360 studio app from the previous step, simply click the camera button (under the video viewer) to save off a regular .jpg file.

With Final Cut Pro, you can also export a frame just like you normally would by clicking File -> Share -> Save Current Frame. Note: this will only work if you’re editing in a 360 video project.
Another option is to open your .mp4 file in Quicktime. Pause the player on the frame you want to save and hit CMD-C. Then open your preview app and click File -> New From Clipboard. Save off the image, and you’re done. Amazing!
How To Put a 360 Photo on Your Blog With JavaScript
This part was surprisingly hard, luckily I did the legwork for you, and you just need to copy me.
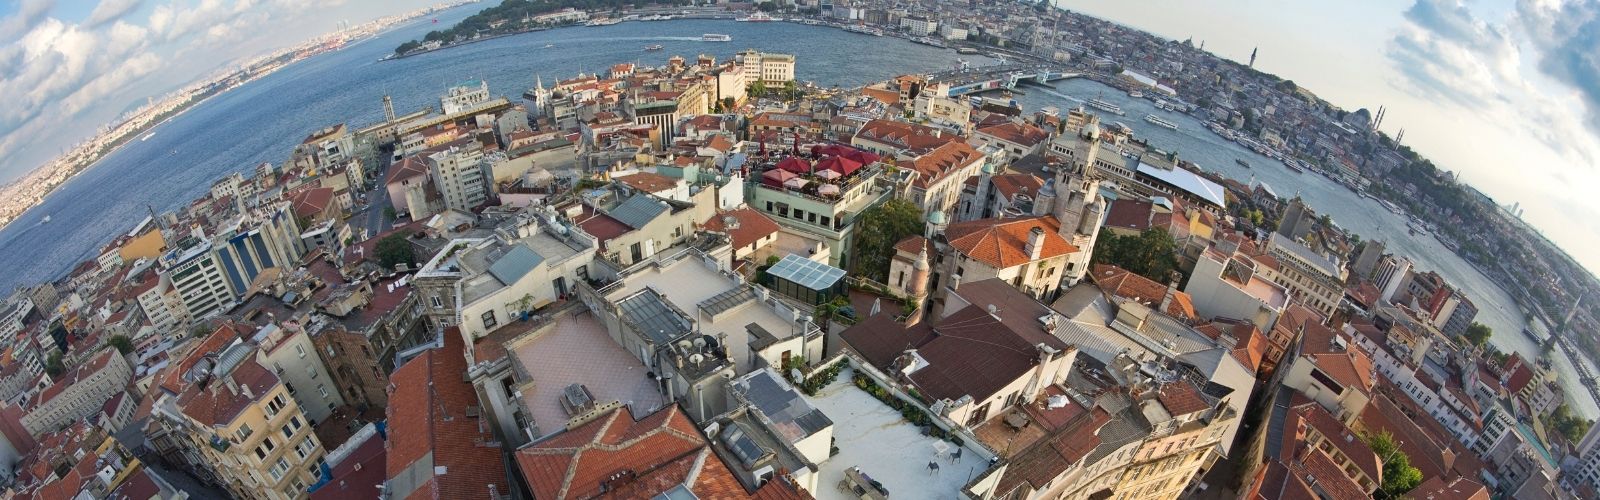
First, the exported 360 image might damage load times on your website. The image is just a JPG, so you can manually resize the same way as any other image. But, I find you need to keep the resolutions fairly high or lose significant detail in the image.
For instance, the image below is 1280×720, and look at all the details in the rocks on the image. This is a nearly 500kb file! If I made the image significantly smaller, the quality would completely fall apart.
As to how I got this on my website, I’m using a JavaScript Library called three.js. Google “equirectangular JavaScript library” for other options. However, in 2026, I felt this JavaScript library was the best option. Unfortunately, it takes a lot of code to get this to work. But don’t worry, I did all the hard work. Simply copy the code below, swap out my jpg file with yours, and you’ll have a 360 image on your website! Amazing!
<div id="container360" style="width:100%;height:400px;margin-top:20px;margin-bottom:20px;"> </div>
<script src="https://cdnjs.cloudflare.com/ajax/libs/three.js/r126/three.min.js" integrity="sha512-n8IpKWzDnBOcBhRlHirMZOUvEq2bLRMuJGjuVqbzUJwtTsgwOgK5aS0c1JA647XWYfqvXve8k3PtZdzpipFjgg==" crossorigin="anonymous"> </script>
<script type="text/javascript">
			var camera, scene, renderer;
			var isUserInteracting = false,
			onMouseDownMouseX = 0, onMouseDownMouseY = 0,
			lon = 0, onMouseDownLon = 0,
			lat = 0, onMouseDownLat = 0,
			phi = 0, theta = 0;
			init();
			animate();
			function init() {
				var container, mesh;
				container = document.getElementById( 'container360' );
				camera = new THREE.PerspectiveCamera( 75, window.innerWidth / window.innerHeight, 1, 1100 );
				camera.target = new THREE.Vector3( 0, 0, 0 );
				scene = new THREE.Scene();
				var geometry = new THREE.SphereGeometry( 500, 60, 40 );
				geometry.scale( - 1, 1, 1 );
				var material = new THREE.MeshBasicMaterial( {
					map: new THREE.TextureLoader().load( 'https://www.shaunpoore.com/wp-content/uploads/2021/03/sample.jpg' )
				} );
				mesh = new THREE.Mesh( geometry, material );
				scene.add( mesh );
				renderer = new THREE.WebGLRenderer();
				renderer.setPixelRatio( window.devicePixelRatio );
				renderer.setSize( container.offsetWidth, container.offsetHeight );
				container.appendChild( renderer.domElement );
				container.addEventListener( 'mousedown', onDocumentMouseDown, false );
				container.addEventListener( 'mousemove', onDocumentMouseMove, false );
				container.addEventListener( 'mouseup', onDocumentMouseUp, false );
				document.addEventListener( 'dragover', function ( event ) {
					event.preventDefault();
					event.dataTransfer.dropEffect = 'copy';
				}, false );
				document.addEventListener( 'dragenter', function ( event ) {
					document.body.style.opacity = 0.5;
				}, false );
				document.addEventListener( 'dragleave', function ( event ) {
					document.body.style.opacity = 1;
				}, false );
				document.addEventListener( 'drop', function ( event ) {
					event.preventDefault();
					var reader = new FileReader();
					reader.addEventListener( 'load', function ( event ) {
						material.map.image.src = event.target.result;
						material.map.needsUpdate = true;
					}, false );
					reader.readAsDataURL( event.dataTransfer.files[ 0 ] );
					document.body.style.opacity = 1;
				}, false );
				window.addEventListener( 'resize', onWindowResize, false );
			}
			function onWindowResize() {
                                container = document.getElementById( 'container360' );
				camera.aspect = container.offsetWidth / container.offsetHeight;
				camera.updateProjectionMatrix();
				renderer.setSize( container.offsetWidth, container.offsetHeight );
			}
			function onDocumentMouseDown( event ) {
				event.preventDefault();
				isUserInteracting = true;
				onPointerDownPointerX = event.clientX;
				onPointerDownPointerY = event.clientY;
				onPointerDownLon = lon;
				onPointerDownLat = lat;
			}
			function onDocumentMouseMove( event ) {
				if ( isUserInteracting === true ) {
					lon = ( onPointerDownPointerX - event.clientX ) * 0.1 + onPointerDownLon;
					lat = ( event.clientY - onPointerDownPointerY ) * 0.1 + onPointerDownLat;
				}
			}
			function animate() {
				requestAnimationFrame( animate );
				update();
			}
function onDocumentMouseUp( event ) {
				isUserInteracting = false;
			}
			function update() {
				if ( isUserInteracting === false ) {
					lon += 0.06;
				}
				lat = Math.max( - 85, Math.min( 85, lat ) );
				phi = THREE.Math.degToRad( 90 - lat );
				theta = THREE.Math.degToRad( lon );
				camera.target.x = 500 * Math.sin( phi ) * Math.cos( theta );
				camera.target.y = 500 * Math.cos( phi );
				camera.target.z = 500 * Math.sin( phi ) * Math.sin( theta );
				camera.lookAt( camera.target );
				renderer.render( scene, camera );
			}
</script>
Can You LiveStream to YouTube in 360°
Yes! You absolutely can and it’s not that hard of a process. I think this YouTube video about how to do it explains it better than I could.
Common Pitfalls to Avoid When Shooting 360 Video
1) Avoid Putting Actors in the Stitch Lanes
As I mentioned previously, 360 cameras work by “stitching” together an image from a very wide-angle shot from a front camera and back camera. You want to avoid standing in the “stitch lane” (where these two images get combined on the side of the camera. The Insta 360 One X2 did a pretty good job of not distorting the image too bad if you stood there, but you still want to avoid it.
2) Treat the Camera like a Person
You should usually place your camera in spots a person might be, even when you’re not using a 360° camera. This becomes even more important on a 360° camera because the viewer will feel like they’re immersed in the scene. Put them somewhere strange, at an odd angle, or way too close to you, and it will feel weird to them.
3) Don’t Get Too Close to The Camera
360° video is an incredibly wide-angle shot. With wide-angle lenses, there’s a lot of distortion if you’re holding the camera too close to you. Try to get the camera further away from your body with the selfie stick that it comes with.
4) Avoid Rotating or Tilting the Camera
With a 360° video, your audience has the power to explore the scene on their own. When you start rotating the camera, you’re overriding the viewer’s custom rotation preferences. It will annoy them if you do it too often.
5) Avoid Jump Cuts
This was the the most challenging part about filming with a 360° video for me. On a normal camera, if I make a gaff, I can simply cut it out of the video. People love it. However, with 360° video, every time you cut, it reorients the viewer. You have to be careful not to do it too often, particularly if your camera is not on a stationary tripod.
Conclusion
I found filming with a 360° camera to be an incredible joy. It’s such a lazy filming experience as you capture literally everything with ease. At one point while filming a dog ran up to me from behind. I’d have completely missed that shot if not for the 360 camera.
Plus, editing the video wasn’t anywhere near as hard as I thought it was going to be.
I can definitely envision several fun scenarios in which I’ll be using this again.