How To Use Your iPhone as an Amazing Dual-Audio Recorder for YouTube

Audio is the most essential part of any video you create.
I’m serious. People might not notice whether your video was shot on a $5,000 DSLR or your iPhone, but they will notice lousy audio right away. Nothing will cause your viewers to bounce faster than bad sound.
Luckily, this is a relatively simple problem to fix. Let’s go over how to get great sound for your YouTube videos.
Place Your Microphone As Close To Your Subject As Possible
The number 1 mistake people make when trying to record audio is that they want to have their microphone attached to their camera. Then they place their camera 6-12 feet away from them.
Sound dissipates with distance according to the inverse square law. What does that mean? It means something that’s 60dB at 6 inches will be 38dB at 6 feet.

You may be thinking, “How is this a big deal, a microphone can still pick the sound up OK. If I want it louder, I can boost the volume in post.”
The problem with this approach is background noise. Maybe a dog’s barking, a plane’s flying overhead, or a computer fan is on. Whatever it is, it’s there, and it’s competing with your voice. The closer it is to the amplitude of your voice the harder it will be to get rid of. The end result is audio with room noise, reverb, and harsh tones.
Luckily there is a simple solution to this. Simply get your mic as close to 6″ from the source as possible.
Use a Dedicated Audio Recorder To Get Your Mic Closer
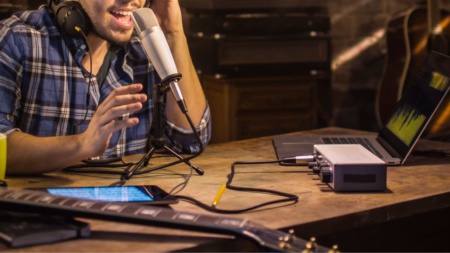
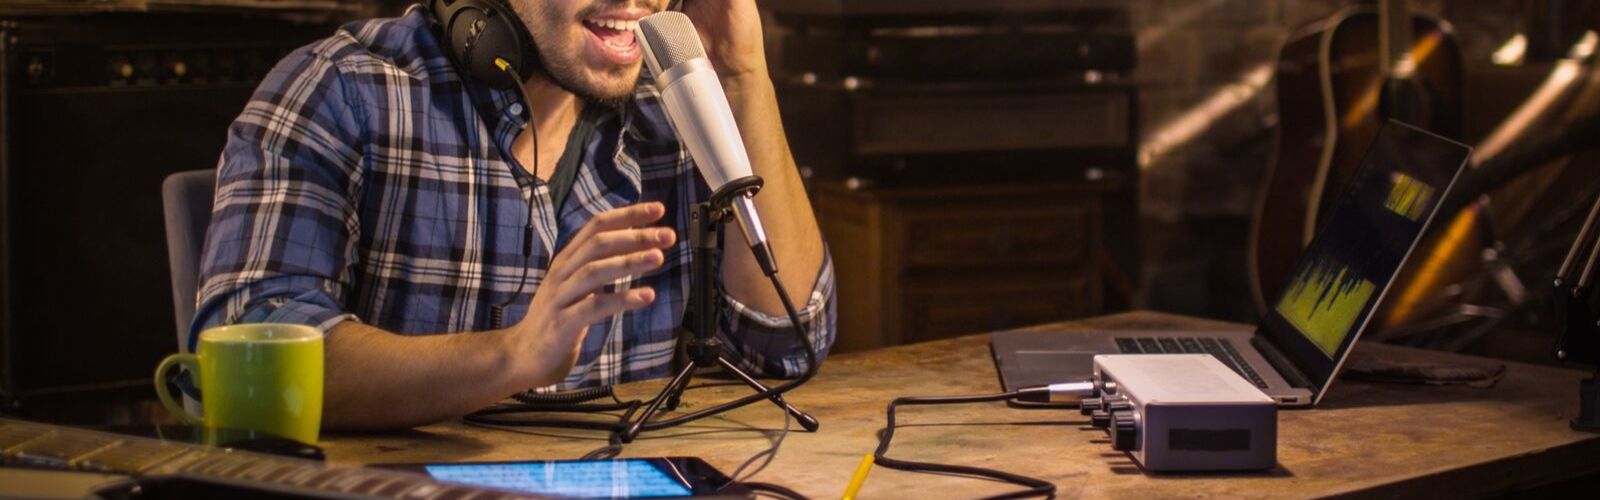
Unless you have a very wide-angle lens, your camera will be several feet away from you when recording. This presents a problem with getting a microphone as close to your face as possible.
Luckily, there’s an easy solution to this. Get a dedicated audio recorder and pair that with a mic to record your voice. After recording, you can sync the sound with your camera while editing the video.
We’ll talk about what microphones to buy in a second. First, let’s get you hooked up with a decent audio recorder.


Dedicated audio recorders like the Zoom H1N and the Tascam DR-05 will both do the job quite well. However, I’ve been making a move off of these devices and onto my iPhone. I’m doing this for several reasons.
- With the right iPhone setup, the audio quality is just as good.
- The H1N uses an SD card, the iPhone syncs files to iCloud automatically.
- The H1N’s file names are confusing and easy to lose track of.
- It’s one less device to purchase and remember to carry around. (although if you don’t own an iPhone already, iPhones are way more expensive).
How To Use Your iPhone To Record Audio
Before we start, we may need to purchase a few accessories. Many iPhones no longer come with a headphone jack; if that’s the case for your iPhone, you’ll need to buy the adapter. Also, the iPhone will only recognize a TRRS cable as a microphone. So if your microphone uses a TRS cable, you’ll need to buy a TRRS adapter for that as well.


Best Smartphone App for Recording Audio
Let’s go over which app to use when recording audio. Many apps out there will probably do the job. However, I’ve chosen to use the Voice Record Pro app (which also has an android app).

There is a specific reason I’ve chosen this app over other apps. It’s because this app allows me to set the Sample Rate, Bit Depth, and Compression Algorithm. Do not use an app for this that doesn’t give you access to these settings.

Many recording apps try to reduce file-sizes by using the minimum possible settings. But, low settings might mean low-quality audio. It’d be a shame to be putting all this work in to lose audio quality over your app.
CD-quality audio has a 44.1 kHz sample rate and a bit-depth of 16 bits. I set the sample rate above to 48kHz and the bit-depth to 32 bits. So these record settings are quite high. You can go higher, but you probably won’t notice a difference.
There might be some debate as to whether you should be recording to uncompressed WAV or lossy AAC files.
This depends on how much editing you plan to do to the audio file in post. YouTube will compress your audio to AAC when you upload it. And AAC files tend to be about 10x smaller than WAV files. For most people, AAC will be fine but definitely give lossless file types some thought.
What Microphone Should I Buy?
Microphones are a very complicated subject that deserves an entire blog post. But, for the purposes of this discussion, you only need to know one thing.
- Expensive microphones placed 6 feet away won’t be as good as a cheap lapel mic placed 6 inches from your mouth.
So the good news, don’t buy a $1,000 microphone. Expensive mics have use cases, but unless you’re an extreme audiophile, a cheap lapel mic will do the job. It will produce a sound that’s as good or better than expensive microphones that are poorly placed.
Here are a couple of options that will work. But, feel free to shop around for even cheaper options.


How To Sync Audio With Your Video In Post.
This part sounds tricky, but with most video editing software, it’s actually a breeze.
The first thing you need to do is record your video. Be sure to record sound both on your camera and your dedicated audio recorder.
At the beginning of your video, clap loudly. Twice.
This may seem nonsensical, but it helps your video editing software sync the audio automatically.
It’s actually the sole purpose of the clapperboards used in Hollywood. They will write the scene name and number to remember what audio file to use, then they clap to help sync the tracks.

How To Sync The Audio in Final Cut Pro
Final Cut Pro and most other video editing software can sync the tracks for you. In Final Cut, all you have to do is select the video and audio file, then click Clip -> Synchronize clips. Like so.

That will create a new clip with your audio attached and synced. Magic!
How To Sync The Audio and Video Manually in Lumafusion
A little secret about me is that I hate Final Cut Pro. It has all the features, but I find it very unintuitive to work with.
A while back, I got a 2018 iPad Pro and fell in love. I was so in love that I decided to try out LumaFusion, an app for iPad video editing. And then I fell in love with that app as well.
Lumafusion may not be as full-featured as Final-Cut, but it’s simpler and faster to work with. I’m making YouTube videos, not cinematic feature-films. Lumafusion dramatically speeds up my workflow for the simple editing I need to do.
However, the thing Lumafusion doesn’t do is automatically sync the audio tracks. In that case, you have to pull both tracks onto your timeline and line them up manually.

This is why clapping a couple of times at the start of your video will come in handy. The two high peaks will help as a visual cue to line up the tracks.