You’re can only trim, blur, add music, or cards to your video after it’s uploaded. So it’s essential to edit your videos prior to uploading them.
That said, these editing features in YouTube can come in handy, so let’s go over how to use them.
Go To the YouTube Editor
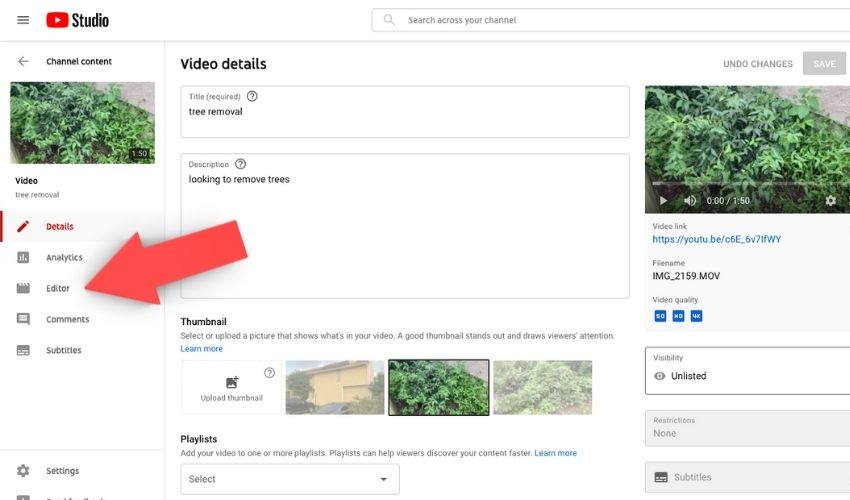
Go to the YouTube Creator Studio for your account, click on the video details of the video you’d like to edit, then click on the Editor link in the left-hand menu.
Decide How You Want To Edit Your Video
Unfortunately, you can only Trim, blur, add music, or add cards to your video once uploaded to YouTube. If you need to do more editing than that, you would have to re-upload your video.
I’ve got instructions on how to do each one below.
1) Trim an Already Uploaded YouTube Video
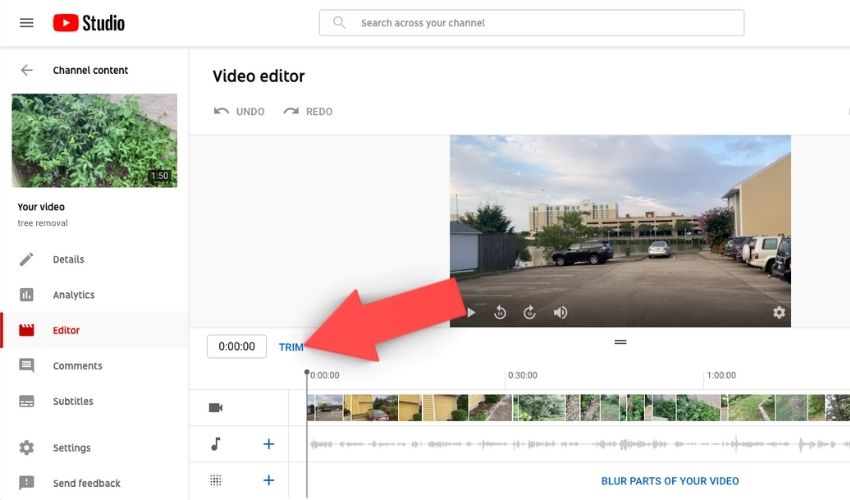
Click the trim link on your YouTube video.
Now navigate your timeline to the starting point of the clip you’d like removed, then click split.
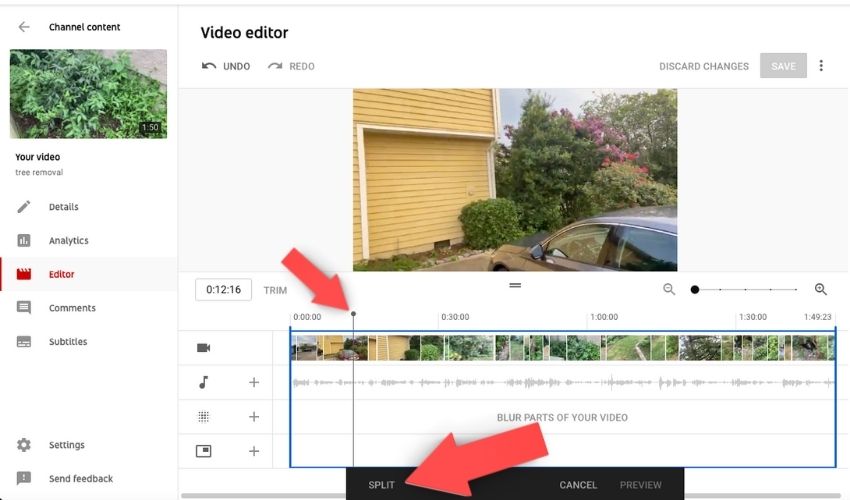
A blue line will appear on your timeline. Simply drag it to the endpoint of the clip you’d like removed, then click preview.
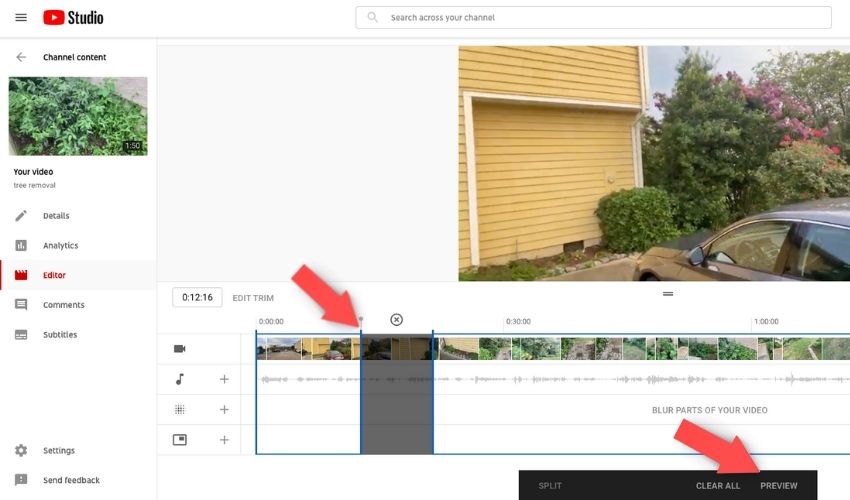
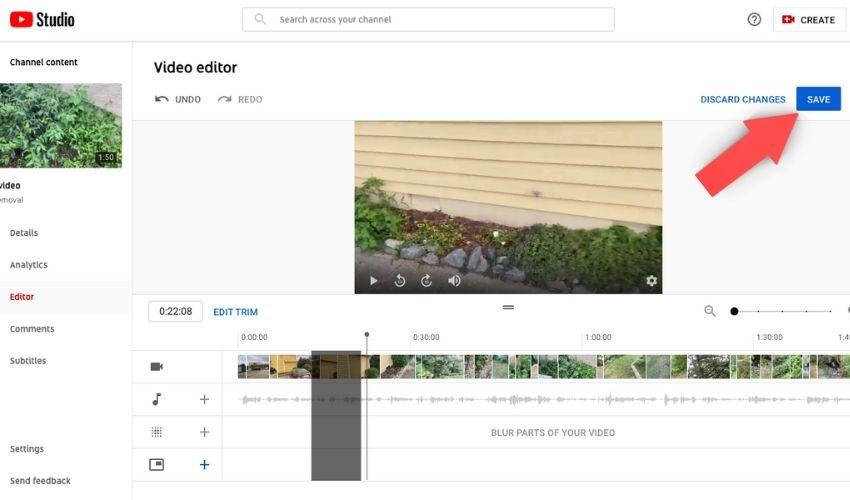
Once you hit preview, you can see what your clip looks like with your changes. If you like it, simply hit Save in the upper right-hand corner for your changes to take effect.
2) Add Music to an Already Uploaded YouTube Video
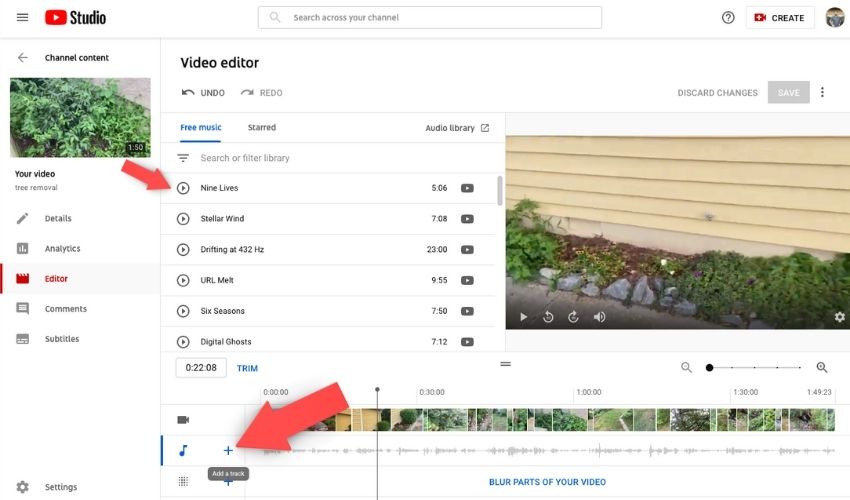
Unfortunately, you can only add music from the YouTube Audio library to an already uploaded YouTube video. So if you were following my post about finding the best music for YouTube, you can’t add custom tracks after the fact. The same goes for if you wanted to add a voiceover or correction.
But, assuming you’re cool with music from the YouTube library, simply click the Add a Track Plus Button (2nd row on your timeline). Then choose a track on the dialog box that pops up.
This editor really sucks for adding music in after the fact. It’s tough to get your levels right, etc. If you’re having music issues, I suggest re-uploading your video over changing music after the fact.
3) Blur an Already Uploaded YouTube Video
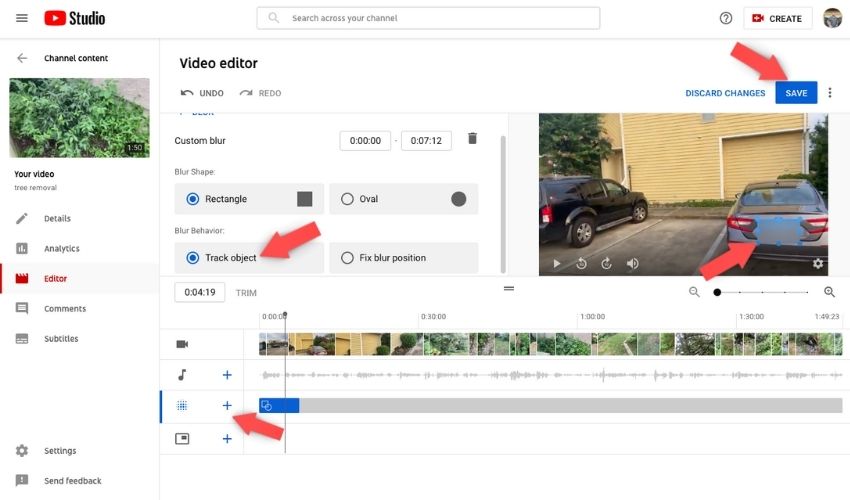
Blurring is super handy. Pretend I wanted to blur my license plate # in my video while keeping the rest of the video intact. YouTube’s blur feature is perfect for this use case.
Simply hit the plus sign next to the blur icon. It will give you the option of doing a face blur or a custom blur. I chose custom because I’m blurring out a license plate #. Then I drag my rectangle over the license plate, click track object, and then save changes. Voila!
4) Add Card To an Already Uploaded YouTube Video
You know when a YouTube creator says, “Check out my other video on that subject here.” They’re using this cards feature to make that video pop up in the corner of the screen.
Simply click the plus sign next to the add card icon to get started. You should see a list of card options pop up.
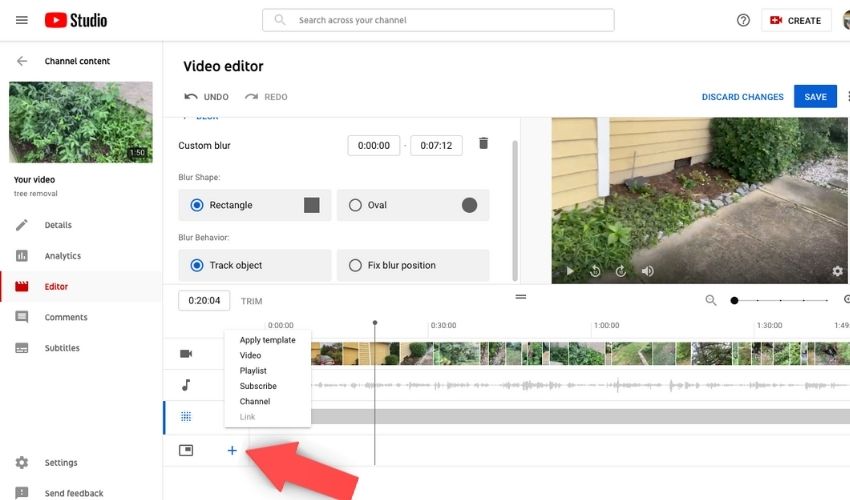
- Apply Template – Simply applies formatting to the other cards. For instance, it will give you the option to select a standard-looking end screen vs. you having to design it yourself.
- Video – This allows you to add a video link to your video with a preview image.
- Playlist – allows you to add a playlist link to your video with a preview image.
- Subscribe – This allows you to add a subscribe link to your video with a channel image.
- Channel -This allows you to add a Channel link to your video with a preview image.
- Link – This allows you to add a standard text link to your video. (Must be a part of the YouTube Partner Program to add links).
Simply choose the option that works best for you, drag and drop what you selected to the optimal location on the screen, then click save.
