
An exceptional looking green screen is hard to assemble in a small space on a limited budget. But, it doesn’t have to be. Once you understand how a green screen works setting one up becomes easy.
I could have fixed this cheaper and easier if I only knew the following simple concepts ahead of time.
1) All You Need Is A Consistent Background Color That’s Different From The Foreground.
I was surprised to learn that there’s nothing particularly magical about the color green. Green is usually used because it’s not likely to match the actor’s wardrobe and skin tone. There are some other technical reasons, but there’s nothing stopping you from using a bluescreen instead. .

Technically, you could apply a key using any color. It will work as long as the background is a consistent color there’s a lot of contrast between the background and the foreground.

In Hollywood, blue screen is how they’ll get the chroma key effect as often as green screen. You’ll see a green screen used if you’re filming Spiderman but a blue screen will be used when filming the Green Goblin.
2) Lighting Your Green Screen With Consistent Soft Light Is The Hardest Part.
You only need a green screen behind you and to not wear green to make this work. How hard can that be?
It turns out quite difficult. First, you need to understand is that your camera is a light measurement device. Objects don’t have color, light does. For instance, here are 3 pictures of my green screen in very different lighting situations. Notice how it can be black, green, or even white if the lighting is off.

Even with a softer light applied across the entire green screen, you’ll have issues with dark spots where there are wrinkles in the sheet. Or bright spots where you’re not evenly applying light to the sheet.
If you want to get an idea of how hard it is to evenly apply light to your green screen, there’s an excellent paid app called “GreenScreener.” The app lets you see the green screen how the computer will see it. You’ll be able to tell where the bright spots and dark spots are on your background with ease and fix them.
If you’re just trying to apply a green screen to a Zoom call a green sheet behind you and some mediocre lighting should work fine. However, I prefer these cool backdrop ideas over using a green screen for Zoom calls.
If you search for a “green screen kit” on Amazon, you’ll get something that looks like below with a bunch of “softboxes” included. Softboxes are boxes or a type of fabric you put over your light bulb to make the light less directional. They give the light less of a spotlight effect. The less directional the light, the better so these kits somewhat have the right idea.

The kit above or something like it will “work.” However, if you’re trying to produce a really incredible key you may find the sheet is hard to work with and it’s difficult to evenly apply light.
An easier (but more expensive) solution would be to simply shine green light on a white wall behind you. The only problem with that is it’s expensive to buy lights that can output a lot of green light as of 2024. These Aputure lights are absolutely incredible but they don’t quite output enough light to cover an entire wall. A cheaper option if you go this route would be to buy these green lighting gels and then put them on top of some less expensive larger lights.
The cheapest (and maybe best) option is to only film during the day in a room that gets a lot of light. The daylight coming into your home may provide enough light, and as long as the light isn’t directly hitting the green screen it should be soft enough.
3) Use Dimmable Bulbs
You need to have lights dedicated to lighting the background for this to work. But, be careful not to use too much light on your green screen. If you blast the sheet with too much light it’ll bounce off the sheet and onto your actors in the foreground. This reflection will give everything in your shot an ugly outline of bright green light coming from behind them that won’t look natural. With motion, it will become more noticeable which will look even cheaper.

If you had unlimited space to work in, You could move your lights, cameras, and actors further away from the green screen. But, I work in a 12ft x 14ft home office. I don’t have space to move everything farther back from the wall until my light levels look right.
Dimmable bulbs become invaluable in this situation. Rather than moving your lights further and further back you can leave them where they are and quickly hit the dimmer switch on them until you’ve got the light levels perfect.
The other reason dimmable bulbs make things easier is that your actors will require more light than the background light.
Have you ever taken a photo of somebody against a sunset? If so, you’ll notice that everything in the foreground appears dark against the sunset. This is because there’s not nearly as much light bouncing off of them as there is coming from the Sun.

A similar effect happens when you’re applying more light to your green screen than to your actors. You could compensate by increasing your light on the actor, but that doesn’t look right either. Things will look much better if you can dim the background lights instead.
I ended up buying 2 of the dimmable LED’s listed below for lighting my green screen. They work great except they have three significant problems.

- They come with a really short power cord so you’ll have to figure out how to hook them to an extension cord and a dimmer switch.
- They’re not particularly easy to mount to a light stand. (EDIT: This Magic Arm works incredibly well for mounting these lights to a cheap light stand)
- It’s not particularly easy to find barn doors for them or a softbox capable of housing them.
Because of those problems right now I’m recommending a different solution. Grab a couple of softboxes with light stands, and then if you need to dim them, use less powerful light bulbs than what comes with the softboxes. My problem with these softboxes was that the bulbs were too bright for the small space I had to work with, and I had no way to dim the light.
The best way to do this would likely be to grab the softboxes listed above but get the dimmable LED package instead. I don’t personally own that so I can’t vouch for how well they work. But, something similar to that is what you’re going for with this.
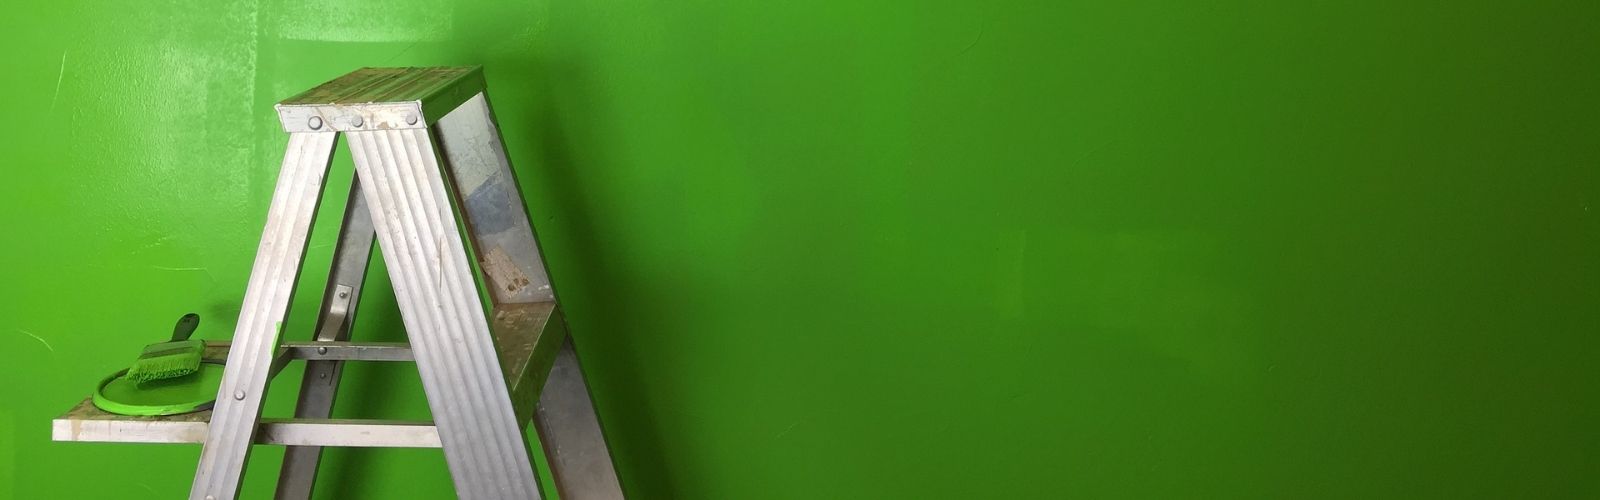
4) A Green Sheet Will Work But It Can Be A Pain In The Butt.
I bought this one off Amazon, and it works pretty well for me. The only problems with it are that it’s big and bulky and hard to move around or hang. I also never really had much luck getting the wrinkles out of the sheet. The sheet would work better if there were 0 wrinkles and it was easy to stretch tight, hang up and move around.

If I were starting over, I’d skip the sheet and use something lighter, cheaper, and closer to the correct color. These picnic table covers only cost about $10 and would work better for the task.

5) Film Vertically, In 10bit 4:2:2 4k, And Focus In On The Foreground.
If you film in landscape, most of your shot will be of the wall. If you film in portrait, most of your shot can be of your actor. This allows you to use more of their body and key them into more scenes. It also means you need to light less wall space correctly, making your life easier.
Also, your camera / camera settings matter. I don’t want to discourage you from trying to film green screen footage with your iPhone because it can be done. But, a higher quality prosumer device like the Sony a7s iii, filming in 4k 10bit 4:2:2 SLog3, is going to get a dramatically better key.
To understand why that is see my post on color sampling and my post on filming in a log format. Short answer is it saves off more color information for your editing program to work with.
6) You Want At Least 12 Feet To Work With
Typically you never want to position your actor directly in front of a wall because they’ll appear “flat” and lose their sense of depth. With the green screen standing close to the wall is doubly unfortunate. You will have the flatness problem, and in addition, you’ll be getting blasted with light meant for the green screen. Standing close to the wall will give you that bright green outline that I talked about above.
Here’s how you want to position everything.
You want the lights for your green screen to be 3+ feet away from the wall to prevent a spotlight effect on the wall.
To prevent soaking your actor with those lights meant for the background, you’ll want to position him about 3 feet in front of the lights.
Then depending on how wide angle a lens you’re using you’ll need about 6 feet in front of the actor to place your camera. Perhaps even a tiny bit more so you have a little room for error. The final setup requires a good amount of space to film in.

7) Fix It In Post
I spent quite a while figuring out how to apply the key while editing. It’s relatively simple in Final Cut Pro (sorry if you use something else to edit).
First import the green screen video and the background you’d like to use into Final Cut Pro. Then add the background to your timeline.

Then add your green screen clip on to your timeline above the background.

From there, if you filmed in portrait mode like I recommended that you do re-orient the clip.

After you’ve re-oriented the clip apply your key to your clip by dragging over the keyer element from the effects tab.

Once you’ve done that your key should be applied. From here something I’ve found helps dramatically is describing to Final Cut Pro where your green screen on your clip is. You do that by selecting their refine key tool and drawing boxes over where your green screen was.

That’s it. I hope this saves you a ton of time when trying to create your green screen! Thanks for reading!